Lock Photography
The following guide lines will help produce good quality pictures with the
equipment that you already have.
General Photography Guide Lines
- Place your lock on a white piece of computer paper. This will give the best contrast
and make cleaning the pictures in Photoshop much easier.
- Set The camera's resolution (Some camera's call this "Recording Pixels")
so that it produces a file of approximately 1MB to 2MB. I
have found that this is an optimum setting for cleaning pictures in
Photoshop.
- Set your camera's light source so that it agrees with the ambient
lighting, such as tungsten, day light, etc.
- Adjust the WB (White Balance) to produce the most realistic
representation of your lock.
- Set your camera to Macro, this is the close-up setting generally
represented by a flower icon.
- Whenever possible use optical zoom instead of digital zoom. Your camera
users guide will explain how to use these features.
- JPEG file format is just fine.
- Many of the modern iPhones take excellent pictures.
-
It might surprise you that some scanners take high quality scans of
flat padlocks. On my Scanner I set it to 24 bit color and 300 dpi.
-
I also have a coin photography tent with base lighting and side lighting by:
TableTopStudio. I rarely use it because my scanner does a nice job which I cleanup in PhotoShop.
Once
again, these are general guide lines to produce the best possible picture with
the equipment that you already have.
Taking high quality professional pictures is an art form and requires the
appropriate equipment and lots of practice.
General Submission Guide Lines
The following guide lines will help in posting your locks on the
website.
- Send 1 lock per E-Mail (Include all pictures of the same lock in 1
E-Mail). This will help me manage the files.
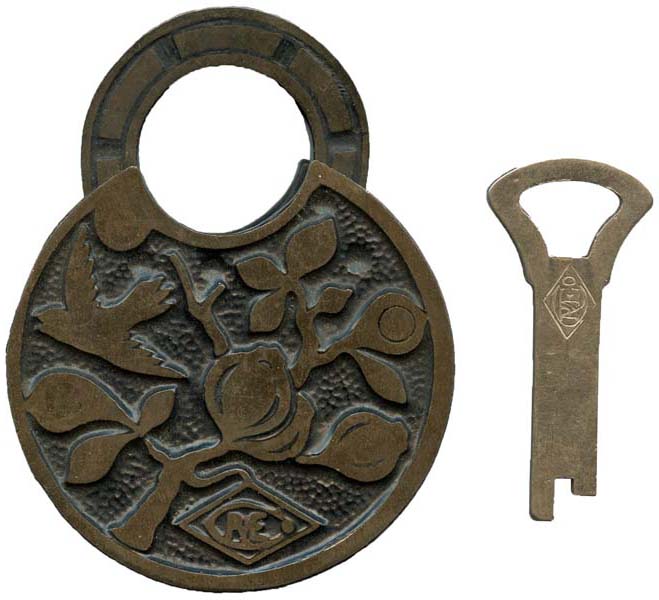
- Take a picture of the front and back of the lock even if you think the back
side of the lock is unremarkable.
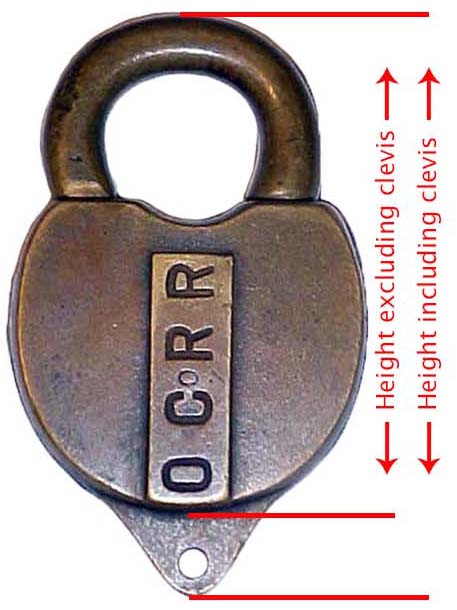
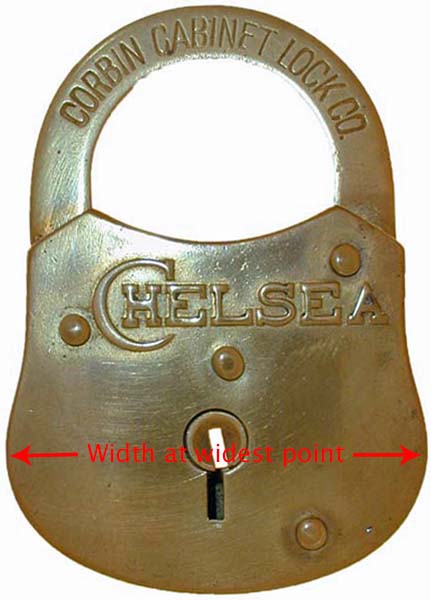
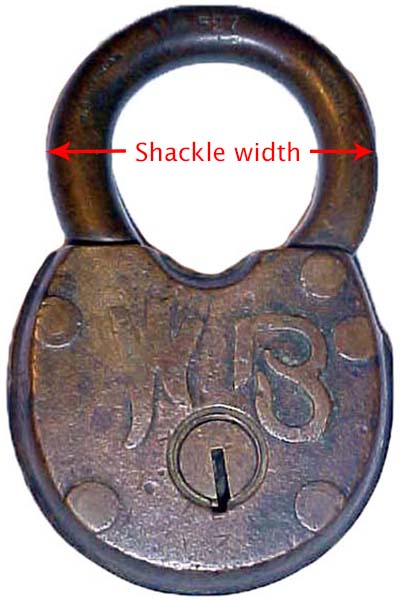
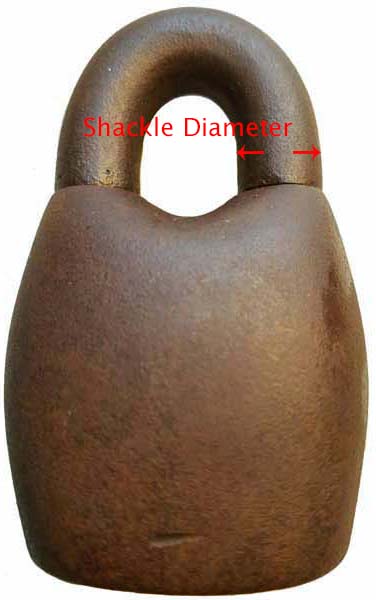
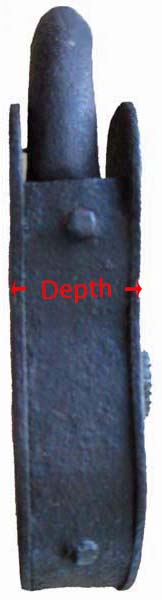
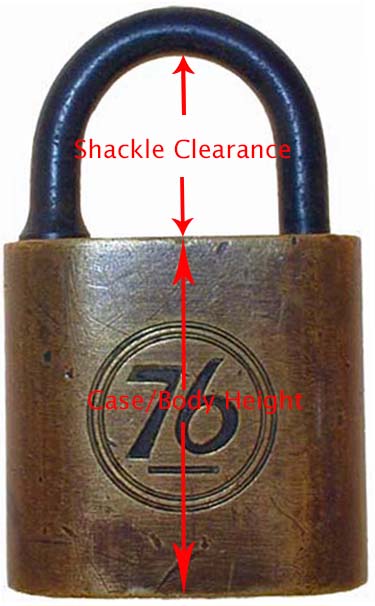
- Include the height and width of the lock.
- If there is writing on the lock and it is not legible please include it
in the E-mail.
- Include any information that you feel is important about the lock, such
as manufacture, etc.
- Include original key if you have one.
Basic Lock Pictures
 |
 |